

How To Create Certificate Signing Request On Mac
Setting Up the APNs Certificate from a Mac
Important:
Use the same computer for the entire procedure.
- Generate a Certificate Signing Request (CSR) on your server.
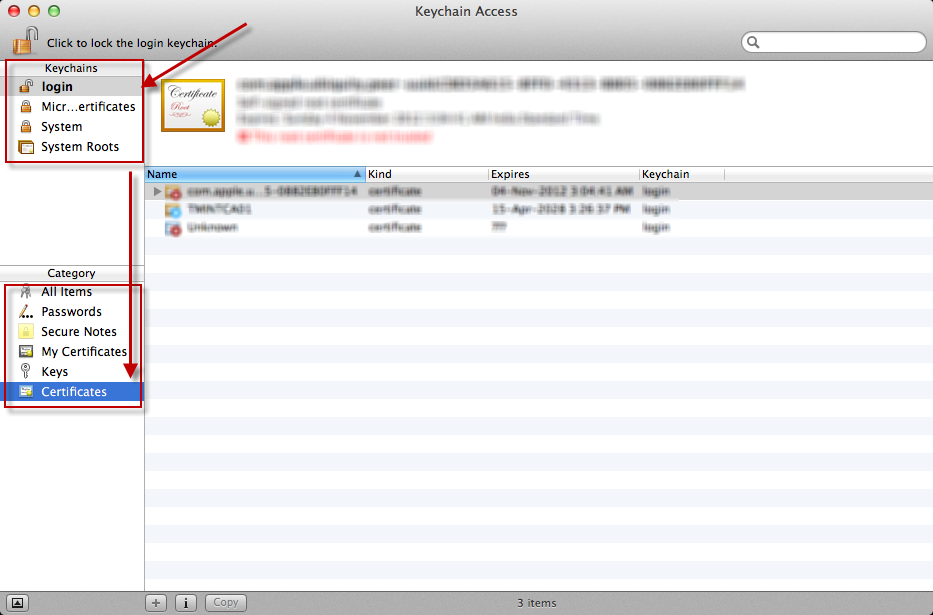
- Click Applications > Utilities > Keychain Access . The Keychain Access screen opens.
- In the sidebar, click login under Keychains and then, click Certificates under Category.
Figure 1. The Keychain Access screen
- Select Keychain Access > Certificate Assistant > Request a Certificate From a Certificate Authority .
Figure 2. The Certificate Assistant screen

- Type the email address and the common name. The common name is only for reference. "APNS Certificate" or "Trend Micro APNS Certificate" are two examples.
- Select Saved to disk and click Continue.
- Save the certificate to the desktop.
- Sign and download the certificate from the admin console.
- Sign in to the admin console. Refer to Logging On for more information.
- Go to Administration > APNs Certificate Settings . The APNs Certificate Settings screen opens.
- Click Upload CSR file....
- Click Browse to select the certificate.
- Type the certificate password.
- Click Upload.
- After the certificate is processed, click Download and save the signed certificate to the desktop.
- Upload the signed certificate to https://identity.apple.com/pushcert to create an APNs certificate.
- Visit https://identity.apple.com/pushcert. The Apple Push Certificates Portal opens.
- Sign in to the site with your Apple credentials.
- Click Create a Certificate.
- Review the terms and conditions, select the appropriate checkbox, and click Agree.
- Click Choose File to select the certificate on your desktop.
- Click Upload. Apple starts processing the certificate and it should be ready in a few minutes.
- Click Download and save the file on your desktop. The file will have a .PEM extension.
- Process the APNs Certificate.
- On your local drive, open the file in Finder.
- Open it with Keychain Access and complete the CSR process by adding the file to a keychain. If you see a prompt to select a keychain, select login and then click Add.
- In the sidebar, click login under Keychain and then, click Certificates under Category.
- Expand Apple Production Push Services and ensure you can see the private key. If you cannot locate the private key, try restarting the computer.
- [Ctrl] + click (or, tap with two fingers) the certificate and select Export.
- Export the file to your desktop in the Personal Information Exchange (.P12) format. If this format is unavailable, try exporting the file again.
- Type and confirm a password. Refer to Tips for Creating Strong Passwords for more information.
- When prompted, type the login keychain password. Click Allow.
- Upload the certificate to admin console.
- Sign in to the admin console. Refer to Logging On for more information.
- Go to Administration > APNs Certificate Settings .
- Click Upload Certificate to choose the certificate.
- Type the password for the certificate.
- Click Upload.
How To Create Certificate Signing Request On Mac
Source: https://docs.trendmicro.com/en-us/enterprise/trend-micro-hosted-mobile-security/c_section_get_start-mdm/c_apns_certificate_getting-mdm/using_own_cert/t_apns_certificate_getting_mac-mdm.aspx
Posted by: griffinfloont.blogspot.com
0 Response to "How To Create Certificate Signing Request On Mac"
Post a Comment